JayP NAS 2.0 – A Real Home Server, Part 1.6: Transplanted
In Part 1.5 of this series I promised some pictures of the server in it's new chassis. I got distracted working on other things, meaning I never got around to that, I guess. Welp, here you go.
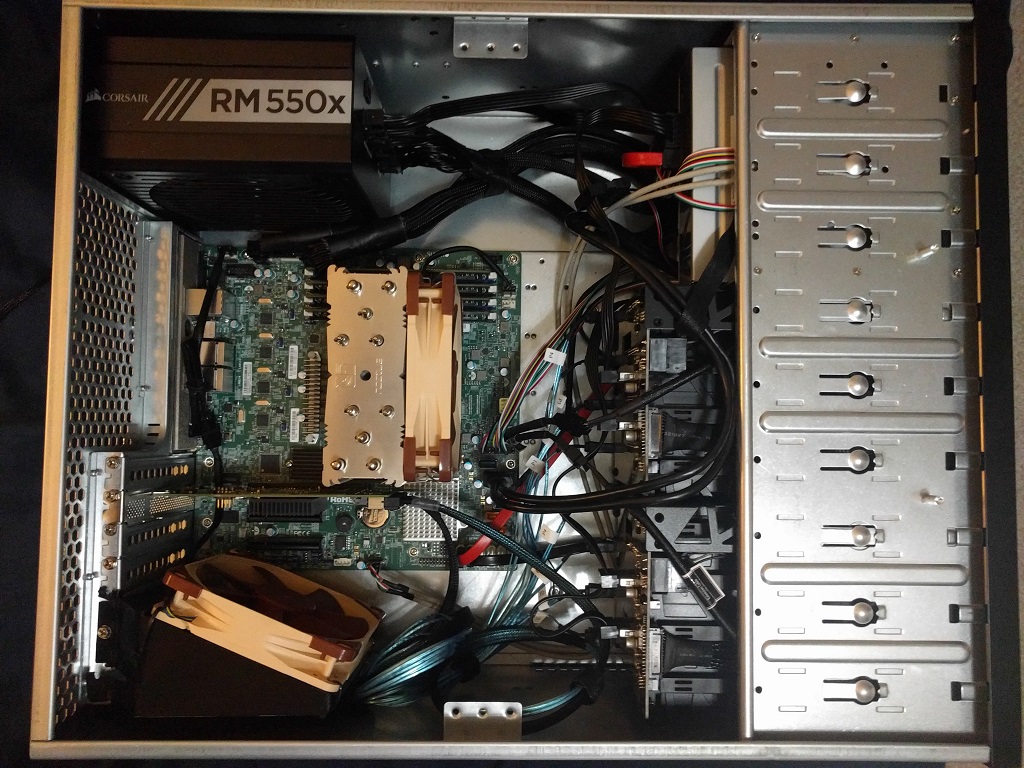
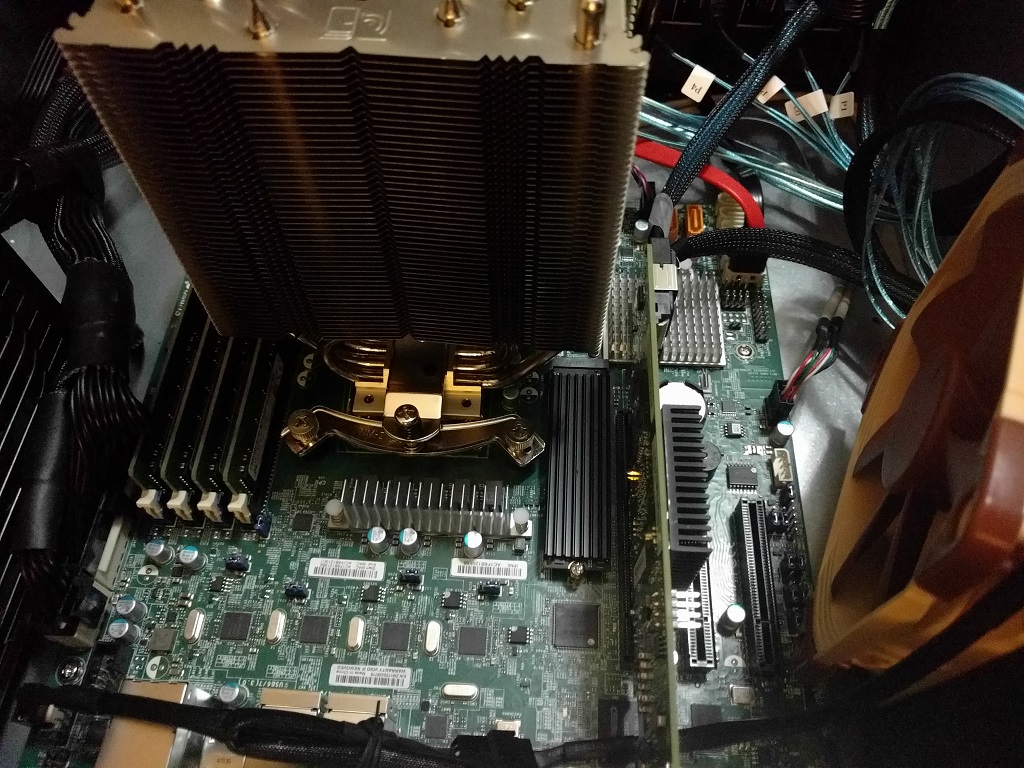
Moving the PSU from the bottom left to the top left helped with the issues I had getting the 24-pin and 8-pin wiring to the motherboard. The drive bays are 2 Icy Dock Black Armor something or other 4x3.5in to 3x5.25in hot swap bays, which have a 120mm fan up front and SATA power in the back. Most such bays have 80mm fans in the back, or use MOLEX power, which is difficult to work with when you're using modern parts. I was worried about the SATA power leads getting down to the drive bays but it worked well. Normally there would be a metal beam ... thing... going between those little metal flanges in the middle of the top and bottom, but I removed it so it wouldn't interfere with the CPU fan. On the bottom left you can see a PCI slot mounted 120mm fan duct. I'm going to print another copy of this as the one I got printed by someone else is terrible. Gotta setup my larger printer first, though.
Here you can see the backplanes for the drives better. It's not clear in this picture because of the lighting but there are holes for air to escape the bays. Those holes aren't that big but it is enough from what I can tell.
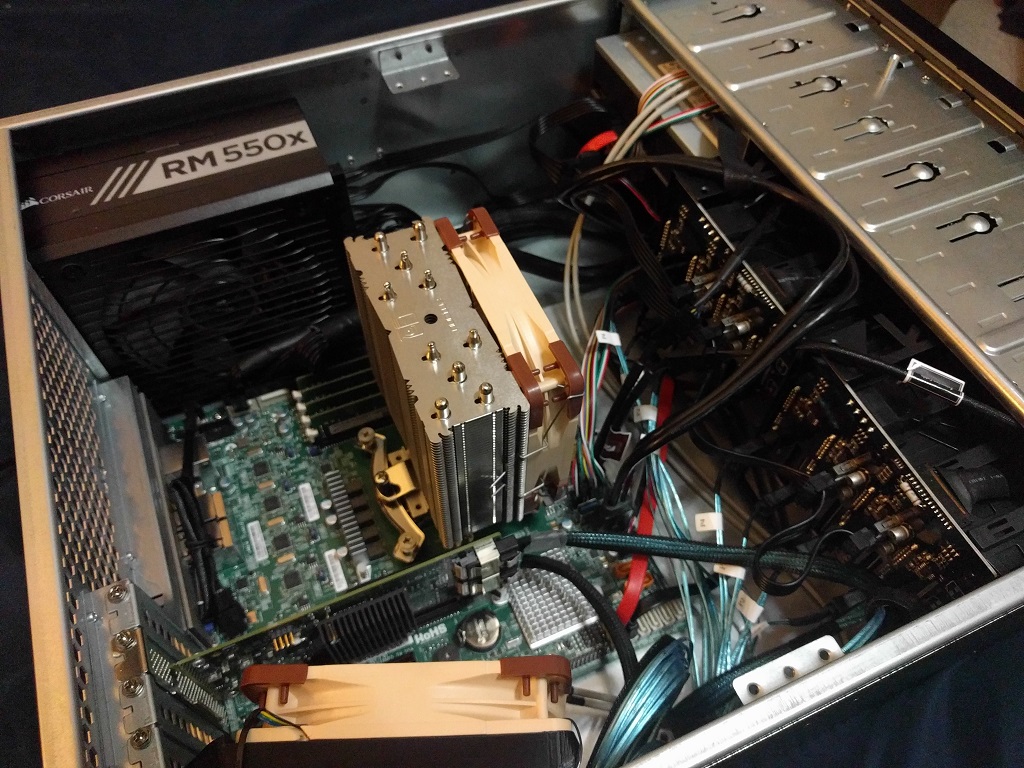
Here you can get a better idea of how difficult it is to manage wires in this chassis. If you're doing something similar I'd recommend spending the tiny bit extra and getting the E-ATX version of this chassis. Besides being longer, providing for more room to manage this wiring, it also has a 3x120mm fan wall. Using that cross beam that goes across the center would help with wire management a bit I imagine, but not enough to justify it being in the way of the CPU fan.
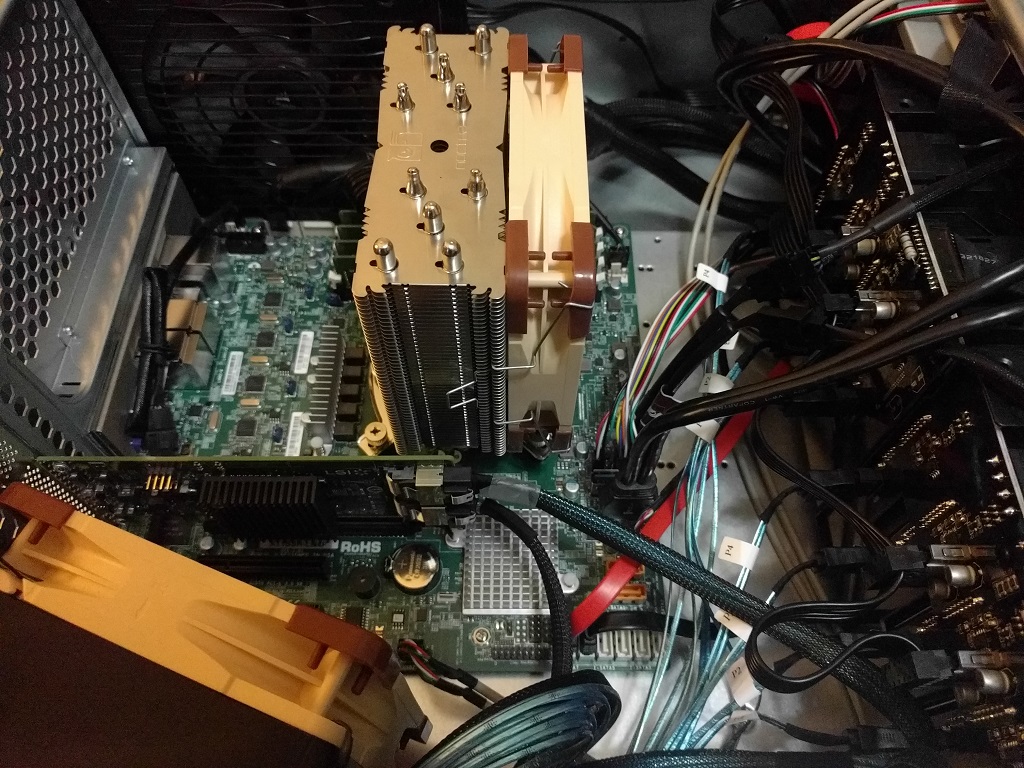
Here you can see the heatsink on the Samsung NVMe SSD. It's helped lower temps by 5-10C on the SSD. On the bottom of this picture you can see I got the Noctua fan's wiring to the FAN4 pins on the motherboard by routing it under the LSI HBA. Helps keep things a tiny bit tidier.
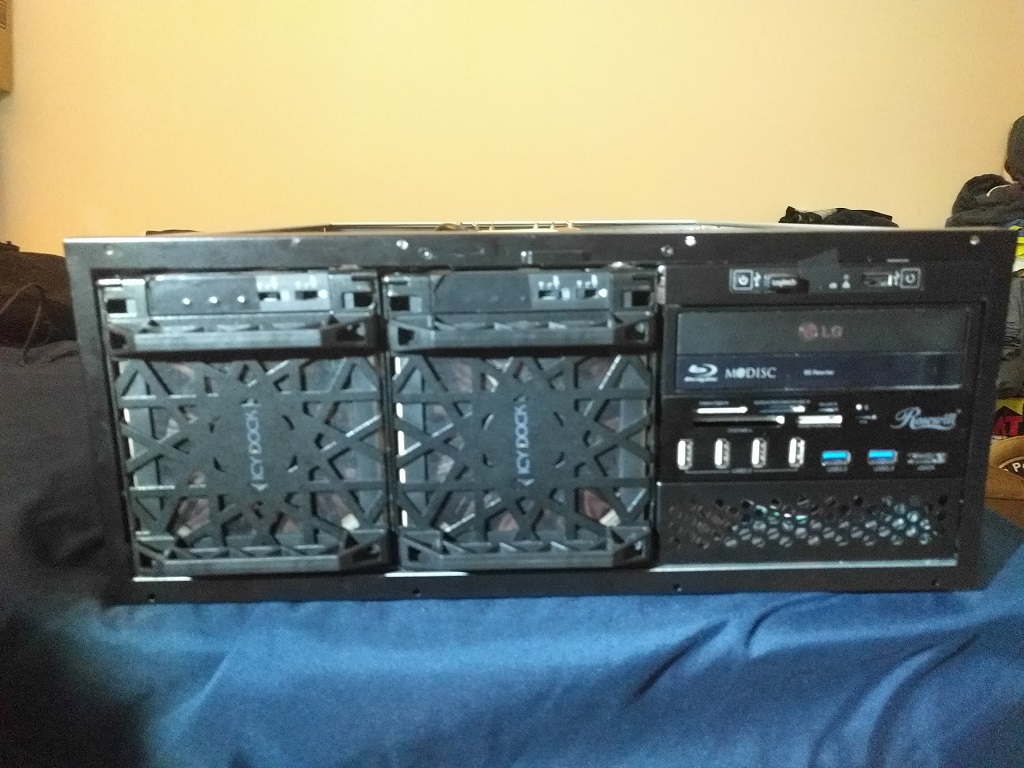
This picture's kinna crap but the best I could get in the terrible lighting in my room. I put electrical tape over all the front panel's LEDs, including the drive bays and the power lights. They're not that bright but it did bother me. I also went ahead and installed my old Blu-Ray writer and a Rosewill USB/memory card reader. This chassis' USB is limited to 2.0, and I really wanted to ensure I kept USB3.0 support since I've gotten to the point where all my USB drives are 3.0 and I'd rather be able to utilize the speed advantage. You can also barely see the top of the CPU heatsink's heatpipes sticking up a bit there... they barely graze the lid when closed.
Some other notes:
- The Icy Dock's include a removable dust filter in the fan-door. Taking that filter out dropped drive temps by ~5C. Ridiculous. I'm looking into alternatives for a dust filter but not really trusting any of my options...
- I also picked up some sound damping foam to put on the chassis' lid to help with noise. It did very little to help, but also didn't raise temperatures so I left it. I've got another sheet of the stuff so I might try working it in to some of the other panels.
- Beyond 1 & 2 on this list, I'm considering the hardware side of this build done. I'm as happy as I'm gonna get with it.